
Two interior paint failures come up more than any other in a Houston house: flat paint in a bathroom, and enamel on a door that got closed before it cured. Neither has much to do with what brand was in the can. Paint is the last trade in the house and it gets blamed for everything the trades before it left behind, but there is real craft in it, and nearly all of it is decided before the finish coat goes on: which sheen belongs where, whether a surface actually needed a primer or just a better second coat, and how much time the humidity here is quietly adding to the recoat window printed on the label.
Sheen is a durability decision before it is a style one
Paint is pigment, binder and carrier, and sheen is largely a ratio between the first two. The more pigment there is relative to binder, the flatter and more porous the dried film. Past a threshold the industry calls the critical pigment volume concentration, there is not enough binder left to fully surround and seal each pigment particle, so the film dries with microscopic voids in it. That porosity is exactly why flat paint hides drywall imperfections so well, and exactly why it holds moisture, soil and mildew. Gloss itself is measured on a meter at a set angle, commonly sixty degrees, and the ladder runs roughly: dead flat under about five gloss units, matte in the high single digits, eggshell in the teens to low twenties, satin in the twenties to mid thirties, semi-gloss from there toward seventy. Manufacturers do not agree on the names, so two cans both labelled eggshell can land in different places. Compare products by gloss level, not by the word on the front.
Why flat paint fails in a Houston bathroom
A shower puts water vapor into a small room faster than most bath fans can clear it. (And globally: vapor, color, colored, miters, labeled, equalizes, paneling, gray.) The vapour condenses on the coolest surfaces, usually the ceiling and the exterior wall, and a porous flat film absorbs it and holds it against the drywall. From roughly May through September the outdoor dew point here stays high enough that the room dries more slowly and less completely between showers, so it is not one wetting event, it is the same wall wetted again before it has finished drying, week after week. What you see is grey shadowing above the shower, mildew freckles in the ceiling corners, and paint that comes off on the rag when you finally try to clean it.
Bathroom walls want satin or semi-gloss, and the ceiling wants at least a bath-rated matte with a mildewcide in the formula. A tighter film gives moisture less to grab and lets you wash the wall without taking the finish with it. The paint is only half the answer: the bath fan has to be ducted to the outside rather than terminating in the attic, and it needs to run fifteen to twenty minutes after the water stops. No sheen compensates for a fan that is dumping wet air over the back of the ceiling drywall.
| Surface | Sheen we normally specify | Reason |
|---|---|---|
| Ceilings, most rooms | Dead flat | Hides framing telegraphing and roller lap; no hand traffic, so washability is not the point |
| Bathroom and laundry ceilings | Bath-rated matte or eggshell | Condensation lands here first and a flat film holds it |
| Bedrooms and formal rooms | Matte or scrubbable matte | Keeps wall imperfections quiet under raking window light |
| Halls, stairwells, kids' rooms | Scrubbable matte or eggshell | Hands, shoes and furniture; the wall has to survive a wipe |
| Kitchen walls | Eggshell or satin | Airborne grease films the wall and has to come off under a degreaser |
| Bathroom walls | Satin or semi-gloss | Direct splash plus months of steam |
| Trim, doors, casing, crown | Semi-gloss waterborne alkyd enamel | Hardest film, takes handling, and defines the line against the wall |
Scrubbable matte, the compromise worth knowing about
The old choice was an unhappy one: flat paint that hid every drywall flaw but could not be cleaned, or eggshell that cleaned up but lit every roller lap and taped joint under a window. Modern washable and scrubbable mattes narrow that gap with tighter acrylic binders and stain-release resins, building a more closed film while keeping gloss down near matte, so the wall still reads soft in raking light and still takes a wipe. Two honest limits go with it. It is a wall paint, not a bathroom or trim paint, and a splash zone still wants satin or better. And matte of any kind burnishes: rub hard with an abrasive pad and you polish a shiny patch into the film that will not go away as it dries, so clean gently with a soft cloth and mild soap, working from the edge of the mark inward. Touch-ups need the same roller nap and a feathered edge or the repair reads as a change in texture. Scrubbable matte also costs more per gallon than standard matte, which is worth weighing across a whole house.
When a primer is doing real work
Primer is not a cheaper first coat. It does one of three jobs: it sticks to something the finish paint will not stick to, it blocks something that would otherwise bleed through, or it evens out how thirsty the surface is. If none of those three apply, meaning a sound, previously painted wall going a similar colour, the money is better spent on a proper second finish coat than on a coat of primer. Self-priming paints are real, but the claim is narrow. They are one-coat-hides products on sound, previously painted, similarly coloured surfaces. They are not bonding primers, they are not stain blockers, and on bare joint compound they behave like paint, because that is what they are.
| Situation | What the surface needs | What happens without it |
|---|---|---|
| Old glossy trim or an oil enamel | Scuff sand to 180 to 220 grit, then a waterborne bonding primer | The new coat sits on the gloss like a skin and lifts in sheets with the first strip of painter's tape |
| Water stain from a roof or supply leak | Pigmented shellac, spot applied over the dried stain | Tannins and dissolved minerals wick straight through waterborne paint and the ring returns, sometimes weeks later |
| Bare joint compound and new drywall paper | Drywall primer or sealer, or a high-build primer | The mud drinks the finish coat and the paper does not, so every joint and screw dimple reads as a dull band |
| Dark colour going light | A primer tinted toward the new colour | Three or four finish coats instead of two, and the old colour still ghosts along the cut lines |
| Smoke, nicotine or pet odour | Shellac or a dedicated stain-blocking sealer | Yellow-brown bleed through the finish and odour that comes back every humid week |
| 1970s and 1980s panelling | Degrease, scuff, then shellac or a bonding primer | Adhesion failure on the printed vinyl face and wood tannin bleeding through light colours |
| Bare wood and MDF trim | Enamel undercoat, sanded between coats | Raised grain, fuzzy MDF edges, and knots that bleed through within a year |
New drywall mud has to be primed or the finish coat flashes
Fresh joint compound and drywall face paper absorb paint at completely different rates. Roll a finish coat straight over that mix and the mud pulls binder out of the film while the paper does not, so every joint, corner bead and screw dimple dries duller and slightly off in colour from the field around it. That is flashing, and it is not a coverage problem you can bury under more paint; it shows through the third coat as clearly as the first. A drywall primer or sealer equalises the porosity first. How much it matters depends on the wall: a Level 4 finish, which is tape embedded plus two more coats over the flat joints, is what a textured wall under a flat or matte paint needs, while a smooth wall in critical light, such as a hallway with a window at the end or a wall washed by can lights, really wants Level 5, a thin skim of compound over the entire surface. A high-build primer helps there, but it is a partial substitute for that skim coat, not an equal one.
One local note. Expansive clay under most of this region swells through a wet spring and shrinks through an August drought, and slab foundations move with it. Cracks that keep reopening at the same door and window corners are that movement, not a paint failure, and painting over them buys a season at best. On our drywall installation and repair work, cracked tape gets cut out and rebuilt before anyone opens a can of paint.
Panelling and textured walls: prep is most of the job
The panelling in 1970s and 1980s houses here is usually a quarter-inch sheet with grooves every four to eight inches, faced either with a thin wood veneer or with a printed vinyl film over hardboard. Both fight paint. The film is not porous, so nothing bonds to it without a bonding primer, and real veneer carries tannin that bleeds yellow-brown through light colours. On top of that sits decades of furniture polish, cooking film and in some houses cigarette smoke, all of which will keep a primer from grabbing if it is not washed off first.
- Wash the whole surface with a degreaser, rinse, and let it dry completely. This step gets skipped more than any other and it is the one that causes peeling.
- Scuff sand with 120 to 150 grit. The goal is to break the sheen and give tooth, not to sand through the face.
- Refasten anything loose into the studs and set the nail heads below the surface.
- Prime with a shellac or bonding primer over the entire panel, including inside the grooves, so both the paint and any joint compound have something to hold.
- If the grooves are being filled, use setting-type compound in two or three passes, each wider than the last and feathered eight to ten inches. Setting compound shrinks less than premixed and will not sink into the groove a month later.
- Sand, spot-prime every fill, and texture to match the surrounding walls before any finish coat goes on.
Texture is the other prep question, and it comes up on nearly every repaint here because most walls in the region carry sprayed orange peel or knockdown. A patch that is filled and sanded smooth disappears while the wall is two colours and then reads as a flat spot from across the room once one colour unifies it, so patches have to be textured to match and primed before the finish coat. Match the roller to the texture as well: a three-eighths-inch nap for smooth to light orange peel, half-inch for medium texture, three-quarters for heavy knockdown. Too short a nap skips the valleys and leaves a coat that looks thin from an angle no matter how much paint went on.
Caulk the trim before you paint it
The line where a casing meets the wall is never perfectly tight, because walls are not flat and mitres move with humidity. Paint alone will not fill those gaps; it leaves a dark shadow line that no amount of enamel closes. Caulk is what separates trim that looks installed from trim that looks finished, and in a climate that swings a wood mitre open and shut across the year, it is also what keeps that joint from telegraphing every season. A few rules matter. Use a paintable siliconized acrylic; pure silicone will not take paint at all and cannot be corrected later without cutting it out. Tool the bead immediately so it is thin and concave, because a fat bead shrinks and splits down the middle as it dries. Caulk is for the joint between two pieces, not for gaps much wider than a quarter inch, which want a backer, a shim or a re-cut instead. And nail holes get filler or spackle rather than caulk, because caulk shrinks into a visible dimple. On enamel-grade trim, fill, sand, then check the fill again in raking light before priming, because every hole you miss shows up once the sheen goes up.
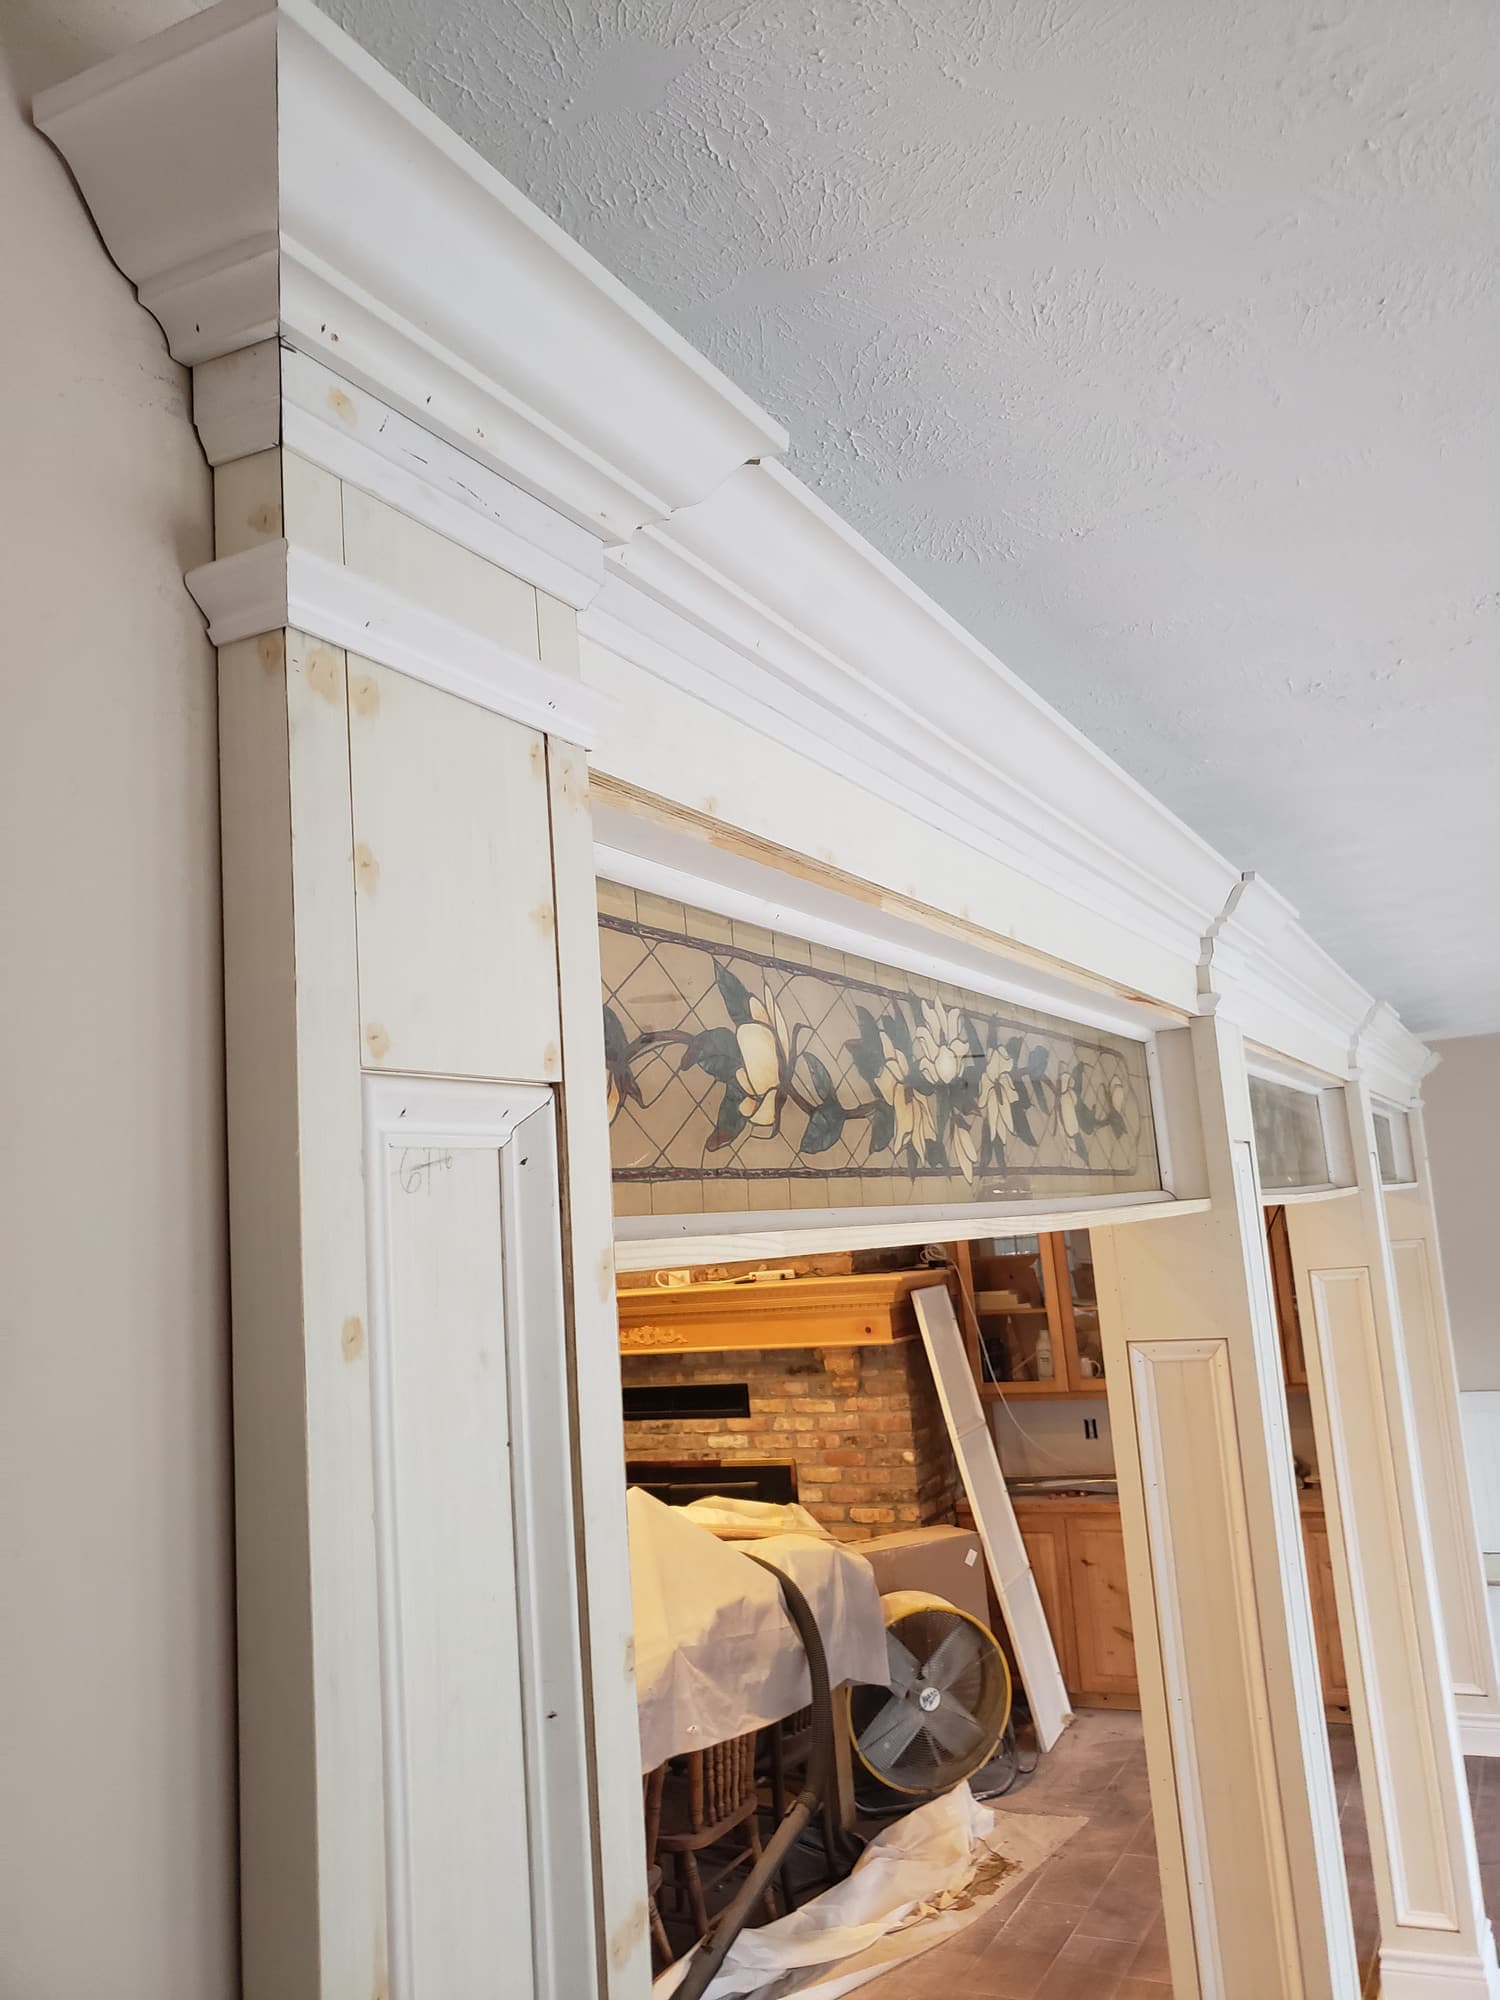
Sequence matters more than most people expect. Where the schedule allows, trim is primed before it is installed, then set, nailed, filled, caulked, sanded and given its finish coats in place. The trim carpentry and the paint schedule are one conversation, not two trades taking turns, and deciding it up front is what keeps a painter from having to cut a straight line against a wall that is about to be patched anyway.
Cutting in twice
Brushed paint and rolled paint do not dry to the same texture. A brush leaves a smoother, slightly heavier film; a roller leaves stipple. Cut in once and roll twice and you end up with a two to three inch band around every ceiling line, inside corner and casing that carries one coat while the field carries two, and that scatters light differently. In daylight coming across the wall it reads as a picture frame around the room, and it gets more obvious the higher the sheen and the deeper the colour.
The fix is what the phrase describes: cut in and roll for each coat, so the brushed band and the rolled field always end up with the same number of coats. Two habits go with it. Roll into the cut while the cut is still wet, bringing the roller within about half an inch of the ceiling line so the stipple carries as far into the band as it can. And keep a wet edge moving across the wall instead of working in scattered patches. A warm room shortens the open time you have to work with, which is why the AC stays on and why we cut and roll one wall at a time in the summer rather than cutting the whole floor first; lapping into paint that has already begun to set leaves a permanent line in anything above matte.
Humidity, dry time, and the reason doors stick
Manufacturer dry times are laboratory numbers, usually measured at 77 degrees Fahrenheit and 50 percent relative humidity. A waterborne paint dries in two stages: first the water evaporates, then coalescing solvents soften the resin particles enough to fuse into a continuous film before evaporating themselves. High humidity slows the first stage, which delays the second, which means the film stays soft considerably longer than the can says.
A closed-up Houston house in August sitting at 75 to 85 percent indoor humidity, which is an ordinary condition in a vacant house with the air conditioning off, can easily double a four-hour recoat. Go back over a coat that is not ready and the roller drags the first coat back off, the sheen dries blotchy where the two films never fused, and tape pulls the whole stack off the wall days later. So keep the air conditioning running through the job, since cooling the air is also dehumidifying it; move air across the surfaces with fans without blowing dust into wet paint; run a dehumidifier in an unoccupied house; and add time to the label rather than trusting it. On our interior painting work in the hot months, the recoat window gets set by how the first coat actually feels under a thumb in a closet corner, not by the clock.
The same physics explains sticking doors. Enamel on doors and trim keeps hardening for days after it stops feeling wet, and a waterborne alkyd that seems firm the next morning can still block, meaning stick to itself, for a week or more. A latched door presses two soft films together and traps the last of the solvent between them, and when it finally opens the film tears off the stop. Leave doors ajar overnight, slip a strip of wax paper at the stop and hinge edge before anything closes, hang doors before the final coats or lay them flat on horses and let them stand, and hold off on reinstalling weatherstrip, bumpers and hardware for several days. Full cure on most waterborne coatings runs two to four weeks, and the film is still gaining hardness that whole time, so no scrubbing, no tape across a fresh wall, nothing set hard on a painted shelf, and no rug pushed tight against a new baseboard.